
The trailer needs to be raised to take some of the pressure off the wheels. The suggested ratio is 70% of the weight on the four jacks, 30% on the tires. This will matter more when there is more structure built onto the trailer.
I guess this is a Tiny House blog now

The trailer needs to be raised to take some of the pressure off the wheels. The suggested ratio is 70% of the weight on the four jacks, 30% on the tires. This will matter more when there is more structure built onto the trailer.

Don’t look at the fence or you’ll get dizzy.
Thanks to Char, Nicolle, and Mike for helping me move the trailer into position! Because they got in on the ground floor they get top priority in the Tiny Time Share queue.
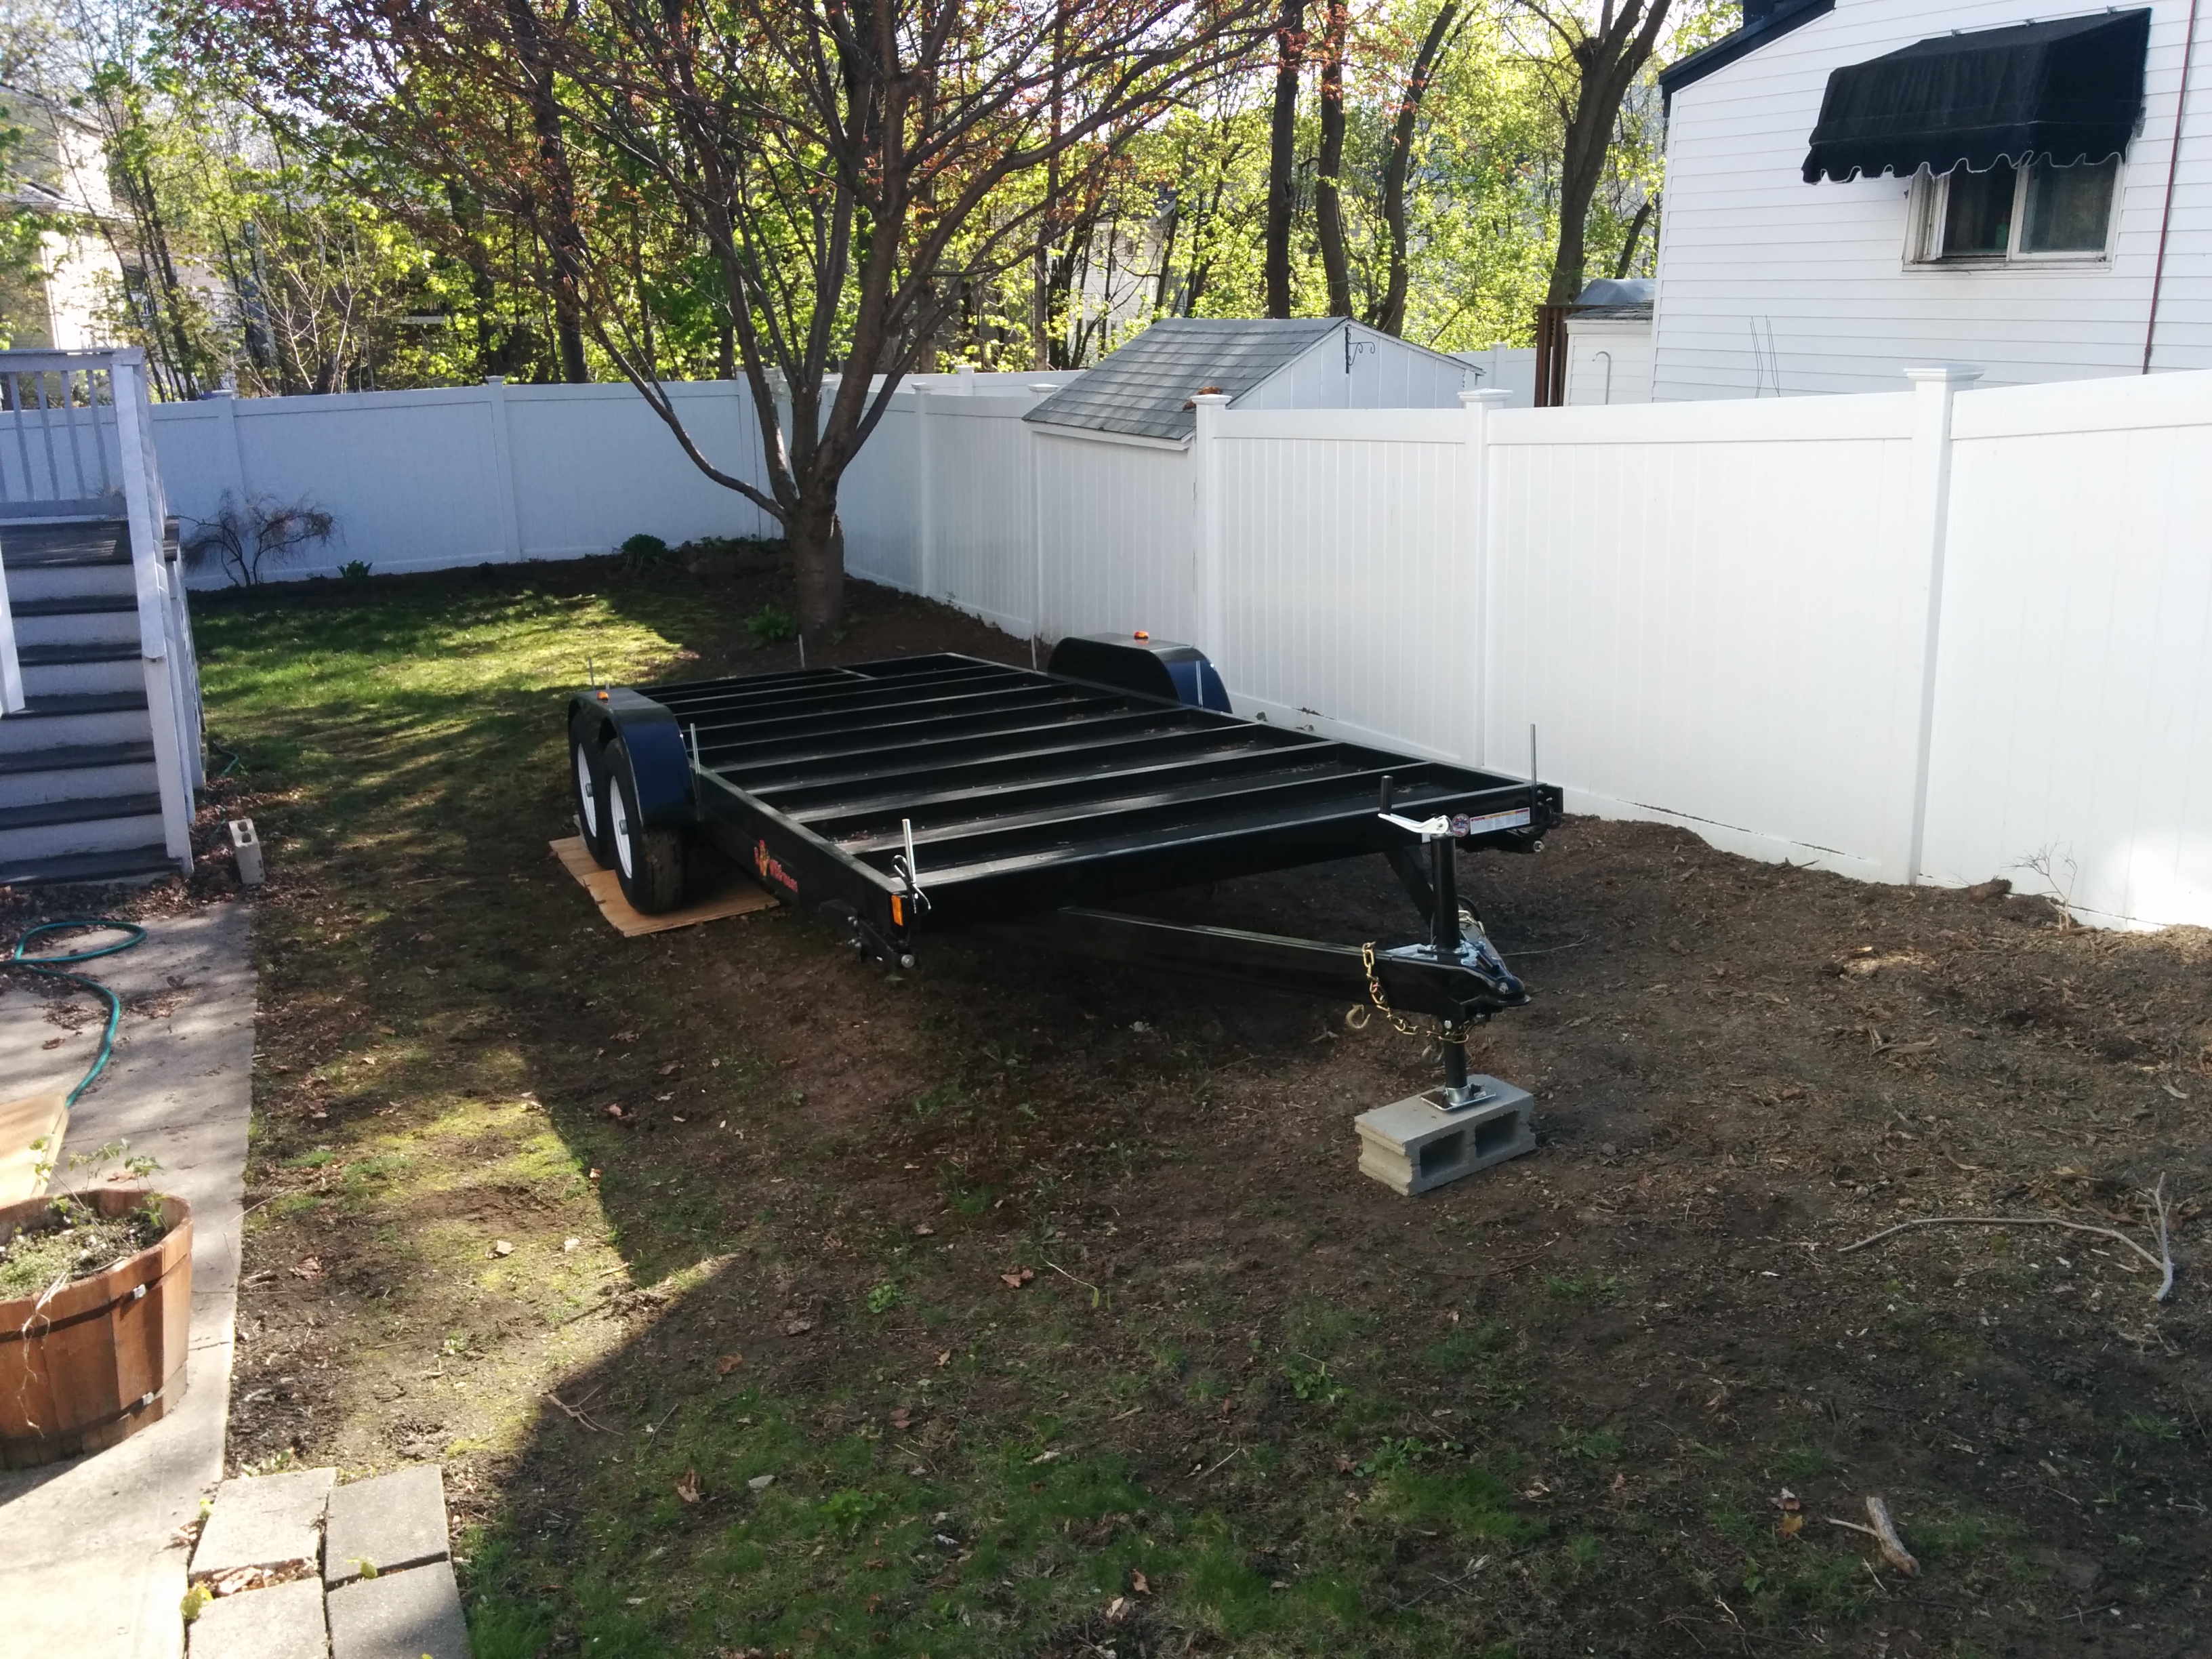
… and the tires are on the plywood, in the planned place in the yard. This is thanks to Mike and Nicolle, since moving it was a 4-person job.

Today, like a bright ray of sunshine in the miserable rain, the trailer arrived! Since I made the irresponsible decision to build in a suburb it was a bit difficult making sure the street was clear of parked cars, and the trailer almost scraped the sidewalk on the way in. It will almost certainly be ten times more difficult getting the finished house out of the yard when it’s done, but I’m going to casually ignore that problem right now.


Photos from Saturday, April 19th.


Sometimes if a system has been around a long time, upgraded a bunch, perhaps restored from backup, it will start to act up in weird ways. This is the dreaded “cruftiness” that Windows was famous for. You could treat a Windows XP system delicately, and there would still come the day when it was performing so badly it was easier to reinstall the OS than try to fix it.
Well, it can happen to linux, too. I was seeing odd behavior with suspend and resume, and very slow wifi reconnect times, and after dutifully filing a bug I eventually determined the problem was some crufty junk on my system related to a hard drive transfer I’d done.
I thought I was in for a class Linux Weekend — install the new OS, copy my home folder, and then painstakingly reinstall all the programs and packages I use that aren’t in the default installation.
No need! Ubuntu now has a special installation mode called “Reinstall”. It preserves all your user files while cleaning out the system folders completely. Then it installs a fresh OS and tries to install as many of your programs as it can find.
After I rebooted, there were a tiny number of custom-installed programs that the system couldn’t reinstall, but otherwise everything was where I left it and suspend and resume now work perfectly. Ah yes, and all of my wifi access points have been forgotten. For something I just let run over night, this was relatively painless and worked great! 5 stars.
I bought a record, and the label is all puffed up so it doesn’t sit flat on the b side.

edit: My buddy Nick points out this happens when the plant accidentally attaches two labels to one side of the record. I carefully cut away the label, and sure enough, there’s a second one hiding underneath. Thanks Nick!
I’ve been trying for a long time to find a simple (for me) way to get sound from my laptop to my TV. I’ve tried mpd, mediatomb, pulseaudio… basically everything short of spending actual money. Finally I found a low-overhead system that does what I need thanks to our friends ssh and alsa: Linux Network Sound on the Very Cheap. Thanks so much to Aristotle Pagaltzis for this recipe.
I’ll reproduce the instructions with my edits:
On the source machine (my laptop in this case), load the loopback ALSA driver:
modprobe snd-aloop index=1 pcm_substreams=1The driver provides a card with two sound devices, and when sound is output onto a stream on one device then the driver loops that back that as an input available on the same stream on the other device. You’ll need to pick an index that’s not already taken by a sound card on your machine or you’ll get an error.
Add this to your ~/.asoundrc:
pcm.loop {
  type plug
  slave.pcm "hw:Loopback,1,0"
}
The original instructions also tell you to change your default soundcard to the loopback device. In this case I don’t want all my sound to go over the wire. Instead, use pulseaudio to select an application and have its sound sent to the loopback device. Yes, I know, pulseaudio. Actually it works pretty well these days! The loopback driver will then make that audio available on its other stream.
On the machine with speakers you can then do this:
ssh -C user@hostname sox -q -t alsa loop -t wav -b 16 -r 48k - | play -q -This command causes a simple dump to be made of the “loop” device on the source machine. That audio data is then piped into the “play” command which causes the sound to play on the machine connected to my TV. This also sets up ssh with compression which helps keep the bandwidth usage down (about 200K/s for me).
All you need to do then is play something from the laptop, open the pulseaudio volume control, and tell the output to go to the loopback device. Very quickly the audio pops out the other side.
Obviously this is no solution for people wanting multiple client control, tablet support, playlists, or anything fancy like that. But as a way of just getting audio from point A to B, this is all I need.
Git has a steep learning curve but persistence pays off. Now that I’ve got the hang of it I can slosh code changes between multiple branches like a motherfucking wizard. Here is a cheatsheet I’ve developed for myself that has helped a lot. This isn’t a complete git HOWTO, it’s more of a list of things that I kept doing wrong as I was learning the system. The tips start relatively basic and get more and more complex. I was coming from svn and bzr so a lot of my tips have to do with confusion that results in coming from those systems.
Rule #1: When in doubt, checkout!
git config --global user.email user@domain

git config --global user.name 'Owen Williams'
git config --global merge.tool meld
git clone [url]
git pull (does git fetch and then merges in the changes)
Don’t use “reset”!
git checkout [file]
git show [sha]
(Don’t actually use this, because the next command is better)
git branch [newbranch]
git checkout -b [newbranch]
(-b runs git branch first to create the branch. You could also git branch [newbranch] and then git checkout [newbranch].)
This works even if you’ve started working! The changes will be moved over to the new branch 🙂
git branch -a
git checkout [branch name]
git merge [branch]
(Only use this as a last resort, you lose wondering commit-tracking this way)
git cherry-pick [sha]
git checkout source_branch [files]
git mergetool
This uses the configured diff tool, or -t [toolname].
Note that with meld, the file called “BASE” (in the center) is the one that is used for the final commit. This is handy because you can pick which edits from the local you want, and which ones from the remote you want. Or just edit the <<< >>> file like you usually do. I find a good way to work is to blindly merge everything from the REMOTE to BASE first. Then I can see what’s different between the REMOTE and LOCAL which is usually what I want to do.
git merge --abort
You’re in trouble now, but this can be done. Examine git reflog which lists all commits for all branches. You want to rewind to before the bad commit.
git reset HEAD@{2} (or whatever label)
Default reset is –mixed, which seems to be ok. don’t do a –hard, like, ever.
When you do a reset, you’ll still be in a weird place with a lot of weird commits, but at least you saved your log. Examine the files and do a commit right away.
DO NOT DO git reset --soft [SHA] from trunk if you’re in a branch! — this will BLOW AWAY your original log of changes, ie how you got to this point in your branch. You’ll have all those changes, but none of the intermediate work.
need to create a local branch that tracks the remote branch
don’t include “remotes/”
git checkout --track -b mybranch origin/branch
git branch -u [parent branch]
git pull is familiar for pulling from a remote repo, but it also works between branches. This is great for hierarchical featuresets, ie:
feature1
feature1-feature2
So let’s say feature1 is in code review, I can keep that clean but keep working on the next feature. I can tell feature1 to pull from master, and feature1-feature2 to pull from feature1. (I name my branches like that so I don’t get lost in the tree.) After doing this to every branch, I can run git pull no matter where I am and everything will be in sync.
Ok so this is trickier, but possible.
first, clone the new repo.
Add the other repo as a remote. here “other-repo” is the name of the new remote branch.
git remote add other-repo [other branch location]

git fetch other-repo

git checkout other-repo/master
Since you can’t actually check out a remote branch, you’re in limbo. Give it a name, creating a place where the other master branch will reside. This is where you’re doing the merge from the old into the new repo.
git checkout -b other_master

git merge master
resolve any conflicts between the two repos. Trust the LOCAL changes, not remote! you want the new master to be in charge, yes?
Now for every branch on the other repo you care about:
check it out
git checkout other-repo/branchname
copy that to local
git checkout -b branchname
merge in the changes that bring it in line with current master:
git merge other_master
then to check your work, compare against new master
git diff master
also notice that all your commits are preserved!
git log