Synchronizing large amounts of music to an Android phone

I am a strange person that likes to have local copies of my music. I occasionally find myself driving in rural areas without a cell signal, or on a flight where I don’t want to pay the wifi charge, or on a primitive subway (like in New York) where the tunnels have no reception ((Please refrain from commenting about how you stream all your music over the internet, and get off my lawn)).

Previously in these situations I’d use a portable mp3 player, the late great Sansa Fuze, and that was good enough. But recently my Fuze bit the dust. Since nobody sells mp3 players anymore ((and I can’t use an ipod)) I have to put all my music on my phone. Copying a bunch of files is simple enough, but I sometimes acquire new music and I want a braindead way to update the music on the phone, preferably with rsync. Unfortunately this turned out to be Hard.

First failed attempt: rsync over MTP

I tried to do the most obvious thing first: connect the phone with USB and rsync from the source to the destination. This does not work well at all. Modern phones connect to computers using MTP, or Media Transfer Protocol, which is designed for extremely simple file listing, copying, moving, and deleting. It doesn’t like random reads and it doesn’t handle partial writes. Over MTP, rsync goes intolerably slow as it tries to figure out which files to copy. I tried setting various parameters on rsync to adapt for this, but nothing worked. Fail.

Second failed attempt: FolderSync from Drive to the phone

The second idea was suggested to me by a coworker. I already have all my music on Google Drive, so he suggested I try using the FolderSync app to sync from Drive to my phone. This sort of worked, but after 300 or so files the process would stall, and then halt. I had to cancel the process and start it over again — at least it was smart enough to pick up where it left off. But after doing that five times I gave up. Also, FolderSync and rsync have different ideas about which files were new. FolderSync was recopying files that were already on the destination and I couldn’t configure it to only look at, for example, the file size when determining which files to copy. Fail.

Third mostly failed attempt: rsync and SSHelper

My third idea was to use SSHelper, a neat little Android app that opens up an ssh server on your phone. I would use rsync, like I wanted to, but it would transfer over the network instead of USB. This worked, but transferring the initial 50 gigs of data over the network was going much too slowly. By this point I’d spent two days trying to get my music on my gotdamn phone and was not feeling patient.

Solution: MTP, then rsync and SSHelper

The idea that worked was to use MTP for what it’s meant for: dumping the music folder wholesale from my computer to the phone over USB. Connect phone, drag and drop music onto phone, wait. Now that I’ve seeded my phone with the initial payload, I can use SSHelper and rsync to update the phone with just the new tracks. Listing and comparing files is plenty fast with SSHelper, and copying whatever few files I updated goes quickly enough over wifi.

There you have it! I do miss the days of just loading up a micro SD card and popping it in the phone, but this solution works perfectly well for my needs.

On The Boogiedownload — behind the scenes

A while back, Nick over at Beantown Boogietown asked me for a mix to post on his website, and recently I put something together that I thought was worthy of publication. Nick went all-out, doing a little mini-interview and giving the mix a very flattering review.

Check it out.

I do want to get one more thing on the record: although I didn’t have a preset tracklist, this isn’t a one-take mix. I did go back and rerecord a few of the transitions that drifted a little. If I was in the middle of a mix and things started trainwrecking a bit, I stopped everything, rewound the outgoing track to the breakdown, and redid the transition. I did that twice. And then when I listened to the recording I discovered nine or ten minutes of the recording was doubled up, making it unlistenable, so I had to go back and rerecord that section too.

I took these four or five pieces into Ardour and spliced them carefully together. I know, the magic is ruined, etc etc. Sorry. I was just really glad that the messed-up section wasn’t the whole last 40 minutes of the mix instead of just the two tracks.

On Debugging

I’ve been doing more programming than usual recently, both at work writing scripts for managing video media, and at home working on the Mixxx DJ software. It seems 90% of my time is spent debugging, and the more difficult a bug is the more I find myself falling into an unproductive death spiral: try to fix the problem by tweaking a little code, recompile, test, fail, repeat. I’ll think that if I just change this one variable, or move this one bit code I’ll be done, but no it’s still broken and two hours later I’ve gotten nowhere. I keep having to relearn the same lesson: you can’t debug well if you don’t have good information.

Often my first stabs at debugging involves sprinkling print statements around my programs ((This article might be rendered entirely irrelevant if you work the Right Way, using debugging interfaces, stepping through code, and looking at live backtraces. But I suspect a lot of people start with print statements)). For simple problems this can actually work well, but as bugs get more tricky and complicated trying to analyze all that screen barf of can be difficult and a huge waste of time. It’s important to recognize when you’re not getting anywhere.

One problem I’ve been working on is the audio processing in Mixxx. When a DJ is using turntables to play music, and especially when they are scratching, the music changes speed radically, often in a tiny fraction of a second. The music will speed up, slow down, and reverse direction. The playback code has to mimic this bending, stretching, and warping that happens on an actual record player. If there are any errors in the math, it will cause ugly and unacceptable pops and clicks in the playback.

The old Mixxx code had a lot of clicks, buzzes, and pops. Certain playback speeds would cause noise, scratching would cause loud snaps, slow speeds caused rapid popping. I wasted several days trying to analyze those clicks by looking at printouts of variables, and only after I got to the point of complete frustration did I take a step back and think about how to attack the problem better.

I had been testing my code with actual music, and that was difficult because actual music often looks random up close — it’s hard to discern where the errors are in all that noise. So step one was to analyze data for the simplest possible case: a sine wave. Any errors would show up as large deviations from the smooth wave. This is a basic first step in making debugging easier: create a simple test-case. If you’re working on a huge data set, or a giant calculation, or a massive document, pare it down to the bare essentials necessary to reproduce the bug.

But even using a sine wave I couldn’t figure out what was going on. With 44,100 samples per second, there was too much data to analyze based on printed-out numbers. I recalled a bit in Michael Crichton’s “Terminal Man” ((This is why Google Books is a good idea)) that explains the problem:

“People,” Gerhard said, in mock irritation. “They just can’t handle machine data.” It was true. Machines could handle column after column of numbers. People needed to see patterns.

The book then proceeds to show both a list of numbers and a graph — the difference in readability is immediately apparent.

With some help from my dad and brother, both of whom often need to plot data, I was able to write a small script to display my debugging information:

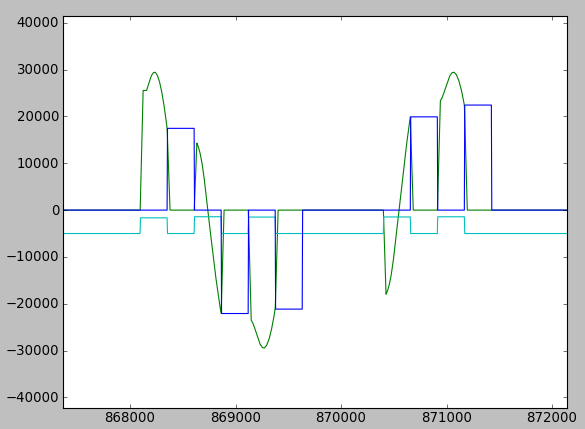
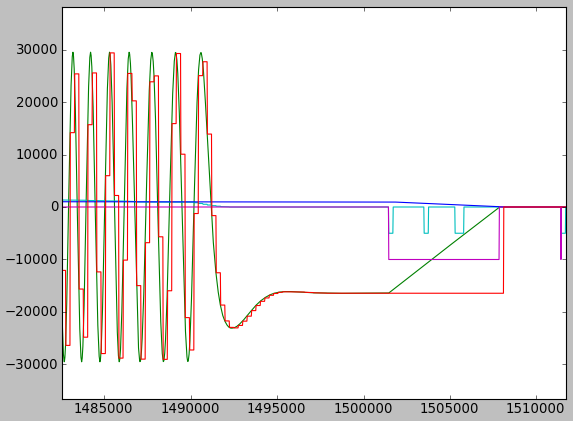
A graph of a vinyl-stretched sine wave

This was a major breakthrough: find the best way to visualize your variables. I’m working with audio data, so a plot is a good choice. It took me a whole day just to adapt my program to write the audio data to a file and to write a new program to display that data, but once I was done the errors showed up as obvious spikes in the graphs. Moreover, by the shape of the waves I could get an idea of why certain clicks were happening: an off-by-one error here, a rounding error there, etc.

The graph above shows several variables: the actual generated sound wave (green), a reference sample (red), playback speed (cyan) ((except that when playback speed is zero, I set it to -5000 so I can see it clearly)), and some other internal variables. If I see a spike I can look at the other lines and figure out where to start looking for a problem — the rate going from negative to positive (a record scratch), perhaps. The output above is correct — a smooth curve that is gradually brought back to zero when the turntable stops. (OK so that linear part at the end is not ideal, it should really be a curve — but otherwise it’s good.)

This is what the old, incorrect code looks like by the way. Notice the obvious errors in the graph, how the green line jumps up and down suddenly:

Bad Mixxx sound stretching

This method debugging could still be improved. I need to get up and scratch the turntable manually to generate data. Time spent triggering a bug is wasted. Every second you’re clicking around is time not spend debugging, which is why you need to make testing quick and easy. A bad test case is one that requires you click some options, open a file, manipulate some UI elements, and then eventually trigger the bug. An ideal test case would be a single command or button in the UI that performs a test. This keeps your mind focused on the bug, not on the boring, repetitive actions needed to trigger the bug.

Debugging is already a slow, painful process, and the prospect of writing extra code and programs just to debug your code can feel like superfluous work. But time spent writing good test cases and analyzation tools will more than pay itself back. Not only will you solve a bug more quickly, you may not have been able to solve the bug otherwise. It’s hard to get out of the tweak, recompile, test, repeat cycle, but you won’t get unstuck until you make your job easier:

  • Recognize when you’re not getting anywhere
  • Create a simple test-case
  • Find the best way to visualize your variables
  • Make testing quick and easy

With my Mixxx work, I still haven’t made testing quick and easy. I should probably write an internal test-case that loads the sine wave and performs a few basic scratches automatically. But even doing only two out of three of the steps got me out of the debugging death spiral.

More Audio 4 DJ tricks

In my DJ setup, I use the JACK sound server to link my mixing program to a bunch of fun effects. It is possible to get JACK to perform at extremely low latencies (~6ms and less) but it’s hard to get all the options just right. For the benefit of others who don’t want to go through the same trial and error I did, here is the command line I’m using to launch jack:

jackd -R -P 99 -p128 --timeout 4500 -d alsa -d AUDIO4DJ -p $size -n $periods -i 4 -o 4 -r 44100

Here’s what all that means:

  • -R: Realtime mode
  • -P 99: Realtime Priority value (maxed out)
  • -p 128: max jack ports
  • –timeout 4500: client timeout in ms. This is very important, because Mixxx might hang for longer than the default 500ms when it’s loading tracks. If that happens, JACK kicks out Mixxx and playback stops
  • -d alsa: Use ALSA backend

(Note, after this argument, the rest of the arguments are ALSA-specific

  • -d AUDIO4DJ: use the AUDIO4DJ alsa device (see my previous post)
  • -p $size -n $periods: These two options are what determines the size of the sound buffer. The first number is the frame size, in bytes (I think). The second is the number of frames. Multiply the two together to get the total size. With a special realtime kernel, I can set this to 64 and 4 (total: 256, or about 6ms). With a standard kernel, it has to be 128 and 3 (total: 384, 9ms). The idea is you want to get the total multiplied number as small as possible without inducing the dreaded XRUN, which happens when your computer can’t feed audio to the sound card fast enough.
  • -i 4 -o 4: 4 inputs, 4 outputs
  • -r 44100: CD-rate audio

Yeah, I know, if I just bought a mac and Traktor or Serato I wouldn’t have to deal with this shit, but I’m cheap and can’t resist a challenge.

DJing on the cheap

One thing I’d always wanted to try was DJing, because hey, doesn’t everyone? It’s like being a musician but without all that hard work, skill, and practice. I’d never really pursued the interest, though, because being a DJ, even as a hobbiest, had always been an extremely expensive proposition. Good turntables cost 600$ each, a mixer is another $100 or more, and there’s all the vinyl I’d need to buy. I know myself well enough that I didn’t want to risk dropping close to a grand on a hobby that, in all probability, I’d lose interest in after a month.

In recent years, laptop DJing has gotten more popular, but I still didn’t want to spend 500$ on the software and more on the mp3 music. I could have acquired these by bittorrent or whatever, but I don’t like stealing software and also hate rebooting into windows. Ideally I wanted an open source program that would run on linux, but most of the options I found sucked. My dream of being a superstar DJ appeared forever out of reach.

Then one lazy day of clicking around the internet I discovered Mixxx, an open-source DJing application. Amazingly, it doesn’t suck. After some experimentation, it became clear Mixxx not only didn’t suck, but was actually pretty good. Around the same time, I’d also discovered the wide world of netlabel music. There are artists all over the world who are more than happy to share their tracks for free on the internet. Because I’m not stealing the music, it’s easy to preview tracks and download the ones I like. I quickly built up a catalog of a few hundred decent tracks. I was very close to actually being able to mix music! Visions of neon-haired techno girls danced in my head.

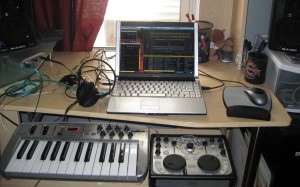
So I have software, I have music, and I haven’t spent any money yet! The Mixxx developers recommend the Hercules DJ MP3 as a good cheap controller, so I snagged one off ebay for 70$. I also have a small older version of this M-Audio MIDI keyboard which I got used for 60$ or so ((I got this when I was playing around with freewheeling, until I realized I don’t play the keyboard)). Lastly, I have an M-Audio Sonica Theater for simultaneous main mix output and headphone preview output ((I also got this from ebay, used. There’s a lot of decent hardware out there that doesn’t really go bad)).

With all of that, my setup was complete:

Laptop, sonica multichannel sound card, midi keyboard (for effects), and Hercules DJ MP3

Total cost: ~$150

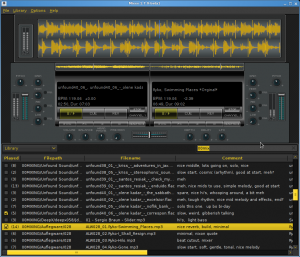
I got some practice spinning tunes, and quickly discovered all sorts of annoying problems with Mixxx and my setup. The default mixxx theme, for instance, is ugly and doesn’t use screen-space well. I downloaded a cool-looking theme called “Trancer”, but then I wasn’t happy with that so I did what any linux user would do — hacked it and made my own version:

My custom Mixxx theme, which fits nicely on my 1280x800 screen

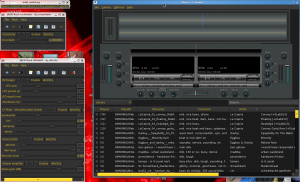
I also wanted to have more control over filters and effects, so I set up a JACK pipeline so I could use my MIDI keyboard to select and tweak effects outside of Mixxx itself. I use the jack-rack program to handle the effects, although I had to hack that too. So when I’m mixing, this is what my desktop looks like:

Mixxx on the right, a couple jack-racks on the left, and a little midi notifier at the top left

And while I was playing some music, I discovered some aspects of the Mixxx music library that I didn’t like. Like, I needed some way of knowing which tracks I’d already played so I wouldn’t accidentally play them again. Also, the search bar also didn’t allow for multiple search terms. So I hacked away at the mixxx source code. Now the search box works right and I know if I’ve played a track as well as how many times I’ve ever played it.

But what type of open-source advocate would I be if I kept this all to myself? So, I present:
Mixxx Trancer theme (DJO remix)
Mixxx 1.7 (DJO remix diff)
jack-rack 1.4.7 (DJO remix diff)

The most important patch is the one for mixxx itself. The library is really hobbled without it.

After all this hacking, I finally have a setup that works well. I’m sure a European jet-set lifestyle is not far behind, but although I’ve been mixing for like, close to two months now, I’m still not a superstar DJ. But I did record one session that I consider post-worthy. I call it, “Mixxx session 090710.” Future mix postings will have a full tracklist, but due to a mistake, this one doesn’t. Enjoy!

Mixxx Session 090710 on archive.org (88 Meg, 1 hour)

Synchronizing baseball radio with TV part 2: the new season

Last year, I wrote a post about using linux and JACK to delay baseball radio broadcasts by 7 seconds in order to bring it into sync with the TV broadcast. Well, today’s broadcast is on FOX, so that provided all the encouragement I needed to get my setup working again. I have since upgraded my laptop, so I was expecting to spend another seven innings getting JACK to work again.

Luckily it was much easier this year. All I had to do was start JACK like this:
pasuspender qjackctl

On modern versions of linux, there’s a system program called “pulseaudio” that normally takes care of all the sound on the system. JACK isn’t compatible with pulseaudio, so it’s necessary to disable pulseaudio while jack is running. Thankfully there’s a little program called “pasuspender” that disables pulseaudio while a specified program is running. So the command above disables pulseaudio while jack is running.

After that, I just had to reproduce the various connections in the screenshot I posted and it all worked. No special kernels, no editing of security files. Phew.

Building an Online Suite: Mac Pro Card Slot Fun

In creating my online suite, I am attempting a feat which many say cannot be done: creating a system that can run both Avid and Final Cut. Furthermore, I wanted to have Avid and Final Cut hardware installed on the same machine — Mojo DX for Avid and AJA Kona for Final Cut.

This type of hybrid system is not for the faint of heart. Video editing is a high-performance activity, and the editing packages are very picky about what software is installed, which versions, and how the hardware is set up. I was able to get everything running fairly easily, but the question is, is it running well or just limping along?

For instance, when I first set up the system, I thought everything was working just fine. Avid was working handsomely, Final Cut seemed to be working ok, and my disk benchmarks showed that my hard drives were working very quickly. However, I found out that external video playback in Final Cut was very poor. The video image on my external monitor would lag behind the desktop window by several seconds. This evening, I discovered that I couldn’t capture more than 2 minutes of high-quality video (1080i uncompressed) into Avid without throwing up an error. Clearly, the two sides of this black and white cookie were not getting along ((That’s right, I’m making a goddamn Seinfeld reference.)).

Both of these problems stemmed from hardware issues, specifically card slot configuration. The Mac has four slots inside it where one can install hardware cards. Two slots are extra-fast “16x” slots. The others are slower “4x” slots. But even then the two 16x slots are meant for different things. For instance, Slot 1 is for the graphics card. And tonight I found out that the 4x slots aren’t identical either.

Because of all the hardware I have (3 additional cards), there are 6 possible combinations for how I can install them. Trying each combination entails 15-20 minutes of rearranging cables and fastening tiny screws, and then another 15-20 minutes of testing. This is on top of the hours of troubleshooting to discover that, in fact, card slot arrangement was the source of my problems.

At this point I feel like I’ve tried all six. My first arrangement was like this:

  1. 16x: Graphics
  2. 16x: RAID
  3. 4x: Kona
  4. 4x: Mojo

Both the Kona and Mojo claim to be 4x devices, so I put them in the 4x slots. I wanted my storage to be as fast as possible, so I put that in the 16x slot.

But, I was getting these problems. Working with my colleagues on twitter, I discovered that the Kona card really wanted to be installed in Slot 2. Once I moved it there, my monitor playback in Final Cut was fixed. So for a couple months, I’ve had the cards arranged like this:

  1. 16x: Graphics
  2. 16x: Kona
  3. 4x: Mojo
  4. 4x: RAID

But then, my Avid problems. Well tonight, I found an obscure document that revealed that the Mojo card wants to be in Slot 2 or 4. Of course since I had it in slot 3, I had to move it again:

  1. 16x: Graphics
  2. 16x: Kona
  3. 4x: RAID
  4. 4x: Mojo

Now, finally, I think I’ve nailed the right order. Avid is able to capture long clips in high quality, Final Cut plays back correctly, my RAID is still reporting very high read and write speeds, and nothing else has exploded (yet).

Moral of the story: If you can afford to have separate machines for Avid and Final cut, yeah, it’s probably wise to do it that way. I wouldn’t want to pay myself for the hours I’ve put in to fixing these issues. But for those adventurous-types, combining the two is not impossible.

Hurray for open source!

In 2001, I filed a bug for the Evolution email client because one of the email filter actions, “forward to email address,” didn’t work. Today, 8 years later, it got fixed. I don’t even remember exactly what I was trying to do, but I seem to recall others telling me to “just do it with procmail.” I know that if Apple Mail or Outlook was missing this feature there wouldn’t be a bug database to lodge the problem in the first place, but I also suspect that Mail or Outlook wouldn’t have overlooked such an obvious feature in the first place. That’s the open source conundrum for you.

Thanks to Milan Crha for finally closing it out.

Building an Online Suite: Early Messy Progress

Today I went to my new online room and started piecing things together. A lot of my gear has arrived, and now I’m just waiting on the major pieces of equipment from my reseller, and the desk. The desk will be the very last thing to arrive (end of January), so it’s going to look crappy for now while I use a temporary desk.

And here it is:

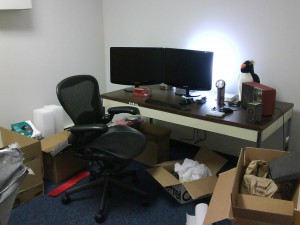
Wide view of temporary editing desk
Preliminary editing setup

What a mess. Here you can see the small, temporary desk I’m using for now, and the two Samsung desktop monitors. I also need room for the grading monitor and scopes. You can also see the chair I got, which is a used Aeron I scored today. I’ve resisted Aerons for a long time because I felt they were the symbol of all that was wrong with the dot-com era. But that was the year 2000, and 8 years later everyone still recommends the Aeron so I broke down and finally gave in. What I really like is that it has a feature that lets you either lock the back upright or allow you to recline. While I’m working I can lock the chair, and when I view cuts I can recline. Ahhhh.

You can also see a stuffed penguin ((more on that in a later post)) and some other desk tchotchkes.

The RAID

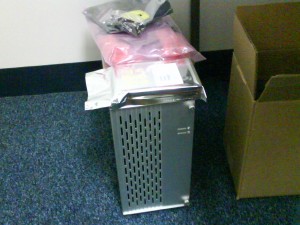
8TB RAID, with one spare drive
Lifezero RAID and accessories

This is my LifeZero RAID, echoblack variation. It consists of a ProAvio Editbox 8MS, 8 1TB drives, and a RocketRaid 3522 hardware RAID card ((I’ll post a more complete analysis of the RAID once I get the rest of the system)). The target price for a LifeZero RAID is 2K$, but I decided it was ok to go a little higher than that by getting better-quality drives. The drives I bought are 1TB Hitachi 7K1000’s, which has a reputation as being a benchmark high-performance drive even though it’s a couple years old.

I also bought one extra drive as a spare. If a drive dies in a few years, it’ll be next to impossible to find the same model of drive so I would probably have to get something “similar” and hope everything works out ok. Instead, by spending an extra 110$ on a drive now, I have a nice insurance policy that should help extend the life of the RAID.

I ripped open all the packages, screwed the drives onto their rails, and inserted them into the enclosure. Even though I don’t have a computer to connect it to, I powered it up just to see what would happen. It did not explode. All the lights lit up and it’s extremely quiet. This is going to be fun!

Other bits and pieces

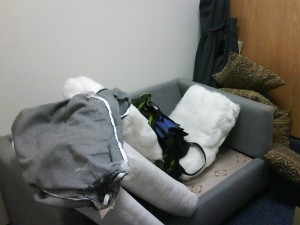
Aside from the RAID, I also took care of some little issues. The free couch I got was looking a little dirty, so I ripped off the cushions so I can wash them. They’re in the drier now 🙂

couch with removed cushions
laundry day, or pillow fight aftermath?

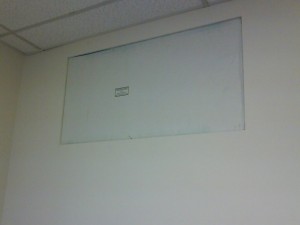
There’s also a window near the ceiling letting in ugly fluorescent light from the rest of the office, so I blocked that with a hi-tech rectangle of cardboard. It’s not as hideous as it sounds:

cardboard blocking a window
Sophisticated light blocking device

The room is still a mess, but I can start to see the editing suite underneath it all. Within a week or two I should get all of my equipment delivered, and then I can really start to set things up.

Designing an online edit suite, Part 1: Can I Afford It?

This is the first in a series of posts I’m planning that will cover the budgeting, design, and possibly even construction of my own online editing suite. The whole plan could fall apart if the income doesn’t justify the cost, but my preliminary spreadsheet-fiddling has been promising.

I left a staff position in September to become a freelance editor, and while I’m happy I made the switch, there’s one big problem I have: I don’t have my own editing suite. All I have is a copy of Avid that I use to edit my reel, and for basic editing that works fine. But the work I get paid for is color correction and online editing, and a dinky laptop is not powerful enough to handle that type of work.

So far I’ve been able to work around the problem by using my clients’ equipment. I have a tablet and monitor calibrator that I bring to the gig, and I spend a few minutes getting everything set up. Even so, this means the color is inconsistent because I use a different monitor every time, and often the process is slowed down because the system I’m using isn’t fast enough. And frankly, I’m picky about ergonomics, so I get frustrated when the chair is uncomfortable or when the light isn’t right. To do this work properly, I really need my own edit suite.

First and foremost, a fully-equipped online editing system is expensive. Can I get enough work to afford it? If I buy the system, will that allow me to do more work, or will I have to raise my rates to pay for it and therefore price myself out of the market? Taking advice from my girlfriend, I’m not going to let the price of the system determine how much work I need to bring in. I will try first to figure out how much work I can get, then see if that’s enough to pay the expenses. If the numbers don’t work, then I can’t afford the system.

Tasks

To know what I need to buy, I need to know exactly what I’m going to be using the system for. Based on the past couple months, I will continue finishing and grading independent projects in Final Cut and Apple Color, possibly outputting to various tape formats. I do not foresee working with high-res 2K 4:4:4 images, so I don’t need a super-fast RAID or the highest-end Kona card. Similarly, I’m not doing audio mixing, so while I don’t want tiny computer speakers, they don’t need to be stellar.

Taking all of this into account, I specced out the following system ((I’ve added links for price reference, but I will probably buy the whole package through my local reseller)):

Hardware
Mac Pro tower (dual-quad 3.0GHZ w/ 8g 3rdparty RAM) $4,000.00
Samsung 22” monitor $260.00
HP DreamColor monitor $2,500.00
E-SATA external 1TB drive $120.00
E-SATA cable and bracket $30.00
AJA KonaLH I/O card $1,300.00
Blackmagic Sync Generator $300.00
Wacom Tablet $500.00
Mouse and pad ((I love these mice. They feel great, are cheap, and last forever)) $23.00
Blue Sky 2.1 speakers $350.00
Behringer Audio Mixer $60.00
Power strip / cables $20.00
Software
Final Cut Studio $1,130.00
Magic Bullet Looks $400.00
Already invested $900.00
Total Additional Necessary
$10,093.00

This is just a rough back-of-the-envelope calculation. It does not include tax and shipping, for instance. But it serves to get me in the ballpark — 10 grand. That 10 grand, spread out over the lifetime of the various parts, comes to about 3700$/year that this system needs to bring in to justify itself.

There are choices I’ve made that might be surprising: is a DreamColor really good enough for professional color grading work? Is 1TB of un-RAIDed storage a good idea? Should I get an Avid Mojo DX so I can finish in Avid as well? Or should I just get The Duck?

Based on my experience, the DreamColor is a big step forward for LCD reference monitoring. It’s no high-end CRT, but for the price range I’m targeting it’s great. For most indie projects, 1TB of storage will be fine. As long as I back up project files, I’ll be working on duplicated media anyway. If the drive should die, the client will still have their own files. As for Avid compatibility, that’s up to the work I can get. Right now everyone is using FCP. But if I have to turn away Avid customers, I’ll have to consider the Duck or a Mojo DX.

What if I want to take it to the next level, though? What if I want to do Avid work, and uncompressed HD work? I’m going to need to add equipment:

Hardware
Second Monitor $260.00
LifeZero 4TB RAID $2,000.00
Upgrade to Kona3 $1,200.00
Blackmagic SDI to HDMI converter ((So that, with the Mojo, I can use the DreamColor as a reference monitor)) $500.00
Avid Mojo DX $7,500.00
Additional Cost $11,460.00

Ouch, double the cost. Have I complained yet about the high cost of Avid equipment? It’s really tough to justify a Mojo DX unless I get a big contract or something.

Now that I have an idea of what the system looks like, what about where to put it? There’s more to a suite than the hardware and software. My next post will cover room design, desks, and other environmental considerations.